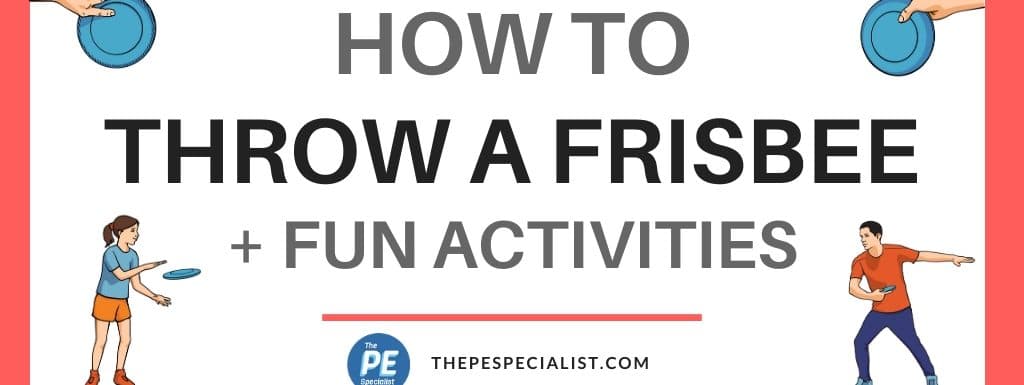
What’s up Friends!
Today, lets talk about teaching one of those classic skills that everybody needs to learn – Throwing a Frisbee.
Check out the video below to see how I teach it to my students and a few sample station activities that we try out to practice our skill and learn to throw the frisbee correctly after going over the Frisbee Throwing Cues.
Frisbee Cues
So to recap below are the cues I use to help kids remember to throw the frisbee correctly.
- Grip:
- Thumb on Top – Fingers on the Bottom
- Throw:
- Point – Cross – Step – Flick
- Catch
- Aligator Snap
- Crab Claws
Gamified Station Activities
Now lets break down the station activities…
These are some K-2nd activities from our Frisbee Unit E-Book that we’ve published in the Membership Program. This is a strategy I use to gamify and differentiate my station activities with my younger students.
The clip at the end of the video above gives you a walkthrough of some gamified station activities and you can also see my Frisbee throwing cues using our Frisbee Cues Poster. You can also check out this older video to see another example and walkthrough of the stations.
This is a strategy that I use quite a bit when I’m teaching any unit. Normally I design my units to be skill work mostly through stations working on closed skills in K-1 as student’s are being introduced to skills for the first time. Later, I move up into more open skills through playing modified games in 2nd-5th grades as students start to develop the skills needed to be able to use skills and play in a more open skill environment.
Of course there are exceptions, but generally that’s what I’ve found best for my students to be successful.
- Open Skills – You perform the skill in a changing environment and must adapt to the environment or gameplay
- Eg.) Pass to a teammate during an invasion game
- Closed Skills – You perform the skill the same way every time
- Eg.) Basketball free throw at practice
To keep station activities from getting old you can always switch them up with modifications or variations. Recently, I’ve been testing the Gamified Station Activities strategy that you saw in the video above and my kids have really been into it. I like it because it allows for differentiation between skill levels and also gives students motivation to try to progress from the easiest to hardest challenges.
The Basics would look like this over 2 weeks/lessons:
- Week 1 – students participate in skill stations, just have 3-5 minutes at each station learning and practicing the skill for the first time
- Week 2 – students now have the choice of doing different levels of difficulty. At each station there are 3 levels of difficulty set up (Easy, Medium and Hard) students can choose which they would like to try, practice for 3-5 minutes before rotating students to the next station.
- Week 2 (variation) – students start at the easiest challenge and try to work their way up to the hardest. Once they complete the hard they can either continue practice or try to give feedback to their peers and coach those who are still attempting to complete the challenges before it’s time to rotate (see the setup diagram below)
![]()
Frisbees:
- Since we’re inside and this is for very novice learners we’re using Soft Foam Frisbees (similar to these) for the Partner Stations and Hard Foam Frisbees for the Target Practice Stations
Modification Ideas:
There are always a ton of ways to modify for equipment/skill differences so just be creative. For example, with one of my lower skilled 4K classes this year I did these exact same station activities except used a gator skin ball instead of frisbee to increase success (and decrease the chances of my frisbees getting all jacked up and picked/bitten apart by the kiddos).
If you don’t have bowling pins or frisbee goals you can make targets with a variety of other items like hanging a hula hoop from the wall, or using cardboard boxes or cones with tennis balls on them.
Making Partner Frisbee Throwing Fun and Motivating
Another great way to work on your frisbee throwing skills and get lots of reps is practicing throwing with a partner.
After a while it might get old though, so to mix it up and keep it interesting you can have kiddos switch partners every 3-4 minutes and also allow them to swap out their equipment if you have more than one type of frisbee that they can try to throw
This is a fun strategy that I use pretty frequently that I call the “Equipment Swap Hack”
See the video below for an example and explanation:
I use this “Equipment Swap Hack” to keep lots of different tasks and activities more interesting in PE class
😃 Bonus Frisbee Activity 😃
Here’s another easy target game I play with K – 2nd at the end of the frisbee unit. It’s gamified with the different levels as you can see in the diagram below. You can also modify it for any skill you’re working on (throwing, kicking, striking with implements etc). My kids like it.
![]()
I think the gamified station activities helped to keep my students motivated and interested, differentiated for different skill levels and also allowed me to get a pretty clear picture of where students were with their skill levels throughout the activity.
Teaching Partner Acceptance with a Throw and Catch Tag
Another thing I do sometimes during my Frisbee Unit is teach the Levels of Partner Acceptance with some Throw and Catch Tag.
You can check out an example of me explaining Partner Acceptance with my students in the video below and see an example of Throw and Catch Tag, which is another great game for practicing working with a partner and playing quick rounds with lots of partner switching.
As you can see in the video I go over the levels with students and then practice with them until they get the hang of quickly partnering up with anyone in their class and our goal is to have at least a Level 3 (Positive Acceptance) or even better a Level 4 (Excited Acceptance) Partner Acceptance Reaction.
Once I feel we’re good to go I teach the kids a game to play with their partner and then we swap it up every 2-3 minutes to give them plenty of opportunities to have a Level 4 reaction and work with different classmates.
To download the poster and see more details on The Levels of Partner Acceptance and How I Teach it check out the link below:
The Levels of Partner Acceptance
The game from the video is an activity I call Throw and Catch Tag, rules below:
Throw and Catch Tag Rules:
Students are in pairs with a ball or frisbee to practice throwing and catching, demonstrate the game first and then let them play.
Rules:
- During the music you throw and catch with your partner
- Optional – you can designate how far to stand, how many steps back or give them freedom to choose what’s right for them
- When the music stops the person with the ball or frisbee (or whoever is closest to it) will be “it” and will try to tag their partner while traveling by using the designated locomotor activity until the music comes back on, when the music comes back on resume throwing and catching with your partner
- Change up partners and Locomotor Movements every 2-3 minutes
- Praise any level 4 reactions that you see throughout the game and refine throwing cues if needed
- Closing Questions:
- How did it make you feel when someone had a Level 4 reaction when you asked them to be your partner?
- Do you think that had an impact on how successful you were and how much fun you had as a team during the game?
Try it out and let me know what you think, or if you have any advice/feedback to make it better – leave it in the comments!
Partner Throw Instant Activity
With my older students since they have some previous experience with throwing a frisbee and most of them are at a decent level of skill, we get into some modified games the learn the basics of Ultimate Frisbee.
I normally do an instant activity with them to kick off our lesson by reviewing the throwing cues and then having them throw with a partner and jog a lap after 4-5 catches.
See below for an example:
I use this same format with lost of units, it’s really simple and transfers well to let kids warm up while getting some practice with the skill that you’ll be working on that day
The Best Soft Frisbee in the World
If you’re searching for a great soft frisbee to use inside check out the video below for a bunch of cool options:
For more Frisbee Resources, check out the Frisbee Resource Pack (deets below)
The Frisbee Unit Resource Pack
The digital download includes:
- A Sample 3 Week Unit Plan: This is my own unit plan and is based off seeing kids once a week for 3 weeks, but can easily be modified with the additional activities included to create a longer plan if needed. Details, equipment needed, and relevant grade level outcomes are included.
- Frisbee Cues Poster: Digital download of the poster displaying the cues I use for the unit and examples of grip, throwing and catching cues.
- Frisbee Station Activity Signs: Tons of different fun and engaging printable station activity signs with custom illustrations and directions on each station sign
- Additional Resources
- Frisbee Golf Scorecard – Perfect for a game of frisbee golf
- 6 Team Scorecard – Perfect for the modified games included in the unit plan
- Easy Scorekeeper Cards (Great for Frisbee Bowling Game)
- Printable Cone Numbering Signs 1-25
If you’d like to purchase our Frisbee Unit Resource Pack from TPT click the link below or if you’re a Member make sure to download it inside the PE Specialist Membership Area (more info on the membership here).
Purchase the Frisbee Unit Resource Pack on TPT
That’s all friends, appreciate you checking out the post and I hope it was helpful – have an awesome day!
Have Fun and Teach On!
If a teacher is being evaluated by the principal. what would be a good lesson plan for tossing a frisbee.
Hey Charlie,
Thanks for reaching out!
Depending on your age group of students, stations are always a good idea to show instruction, management, and assessment.
Check out the link below for stations activities for Frisbee:
https://youtu.be/qlaoba47qTg
Hope this helps!
thanks so much for you r support really great lesson and so fun for my student’s
You’re welcome Marwa!
Glad you’re enjoying the resources!
Where do you get those soft frisbees? Thank you!
You can find all Ben’s recommended equipment and technology tools at the link below:
http://thepespecialist.com/amazon
Here is a link to the soft foam frisbees:
Mesh Covered Foam Frisbees http://amzn.to/2svyvDV
Hope this helps!
=
Great stuff Ben!
Even us old Dogs need to be refreshed… I liked the station review and activities. Thanks brother Ben for all you to make it possible for others to do! Coach Tom
Edmonds School District
You’re welcome Coach Davis!
Sure you’re right! Never stop learning!
Glad you’re enjoying the resources!
This is great
Glad you’re enjoying the resources!
Hi,
I’m curious how you organize activities like “target toss competition” or stations where the kids are throwing an object and then having to run and get the object. Do you tell them that every kid must throw before the team is allowed to run after their ball/frisbee, etc. Or do you just have kids running all around while other kids are throwing? I just imagine kids getting hit or getting in the way if they are allowed to run right after they throw.
Normally it depends on the type of frisbee and the space (and the age of the kids) if you’re using soft foam frisbees, then a free for all is no big deal because there’s no chance of injury. If they are hard foam then you might be OK if you have a bigger spaced area, but if it’s a small space then you’ll probably need to have all the kids throw at once and then go get the frisbees before the 2nd throw. For station work I normally only have 6-7 kids at a station, so it’s not as much of an issue.
Thank you so much for sharing all of your GREAT ideas. I teach an elementary school with 490 students. I am always looking for helps to improve what I am doing. I appreciate you!
Hey Nichole,
Thanks for the feedback! Glad you’re enjoying the resources.
I teach 4 -6th grade. Will this work for my 6th graders too?
Hey Debbie,
All of the activities should work for your 6th graders. You may need to modify or advance the activities depending on their skill level.
Marcus
hello
We are playing frisbee target toss competition. The kids are frustrated when someone is up at the pins gettting their frisbee, after throwing at the pins, and are in the way of them trying to throw at the pins. How do you handle that? How can we keep them out of the way so others can still throw?
I would probably just say “Find some open space” nothing is keeping them from moving their feet – open space is the key to so many games/activities.
Hi,
I stumbled across this website and LOVE it. I’m a PreK teacher in public school and have been trying to find a set of soft frisbees (small size) for my students. We found 3 silicone frisbees on the playground and they were a hug hit, but they belonged to a 3rd grade class whose teacher bought them on sale at Wallmart. I tried to find there, but no longer available. Can you recommend where I might buy a set of soft, small frisbees for little hands please? THANK YOU!!!
Hey Angie! Glad you’re finding the site helpful, there are links in the post above to the foam frisbees I use, although not sure how durable they would be for a recess situation being used everyday and outside they might get destroyed pretty quickly. I would just check on Amazon and look for something similar to what you originally had, for example: https://amzn.to/2RDKMDB Good Luck!
wonderful lesson
thank u
Glad it was useful!
So cool!
Where did you buy those frisbees?
Links are above in the post 🙂
Great!
Thank you for the extra tips.
Niki