What’s up, PE Fam 👊🏻
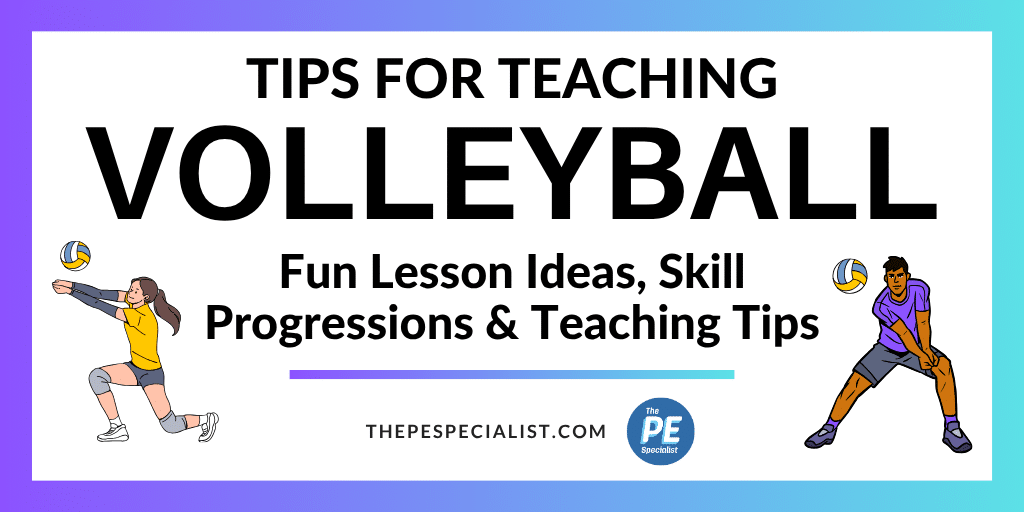
Let’s Level Up Your Next Volleyball Lesson 🏐
Are you planning your next Volleyball Unit or Volleyball Lesson and looking for some ideas?
If you’re looking to teach an energized volleyball lesson where students get exposed to the sport, feel confident, and learn the basic skills to play a modified game, you’re in the right spot. Here’s how I build engagement, skill, and fun into my volleyball lesson👇
How Long is Your Unit?
The first step in planning any Unit of Instruction is to figure out how many lessons you want to include or how long your unit is.
In my situation I see my students only once a week, so I normally plan 3-4 weeks of focusing on games and activities that use the skill of striking with hands. This is also one of the only units I teach where I break up the unit into 3 different sports or games instead of focusing on only one sport – We learn 4 Square, Gaga Ball and Volleyball, one game each week (If I have time, sometimes I will squeeze in a 4th week and do 2 lessons on Volleyball). I also try to rotate in a few Spikeball Lessons every other year if I can find a good spot on the calendar to squeeze it in.
The reasoning behind this is that when Planning My Yearly PE Curriculum and thinking through My Scope and Sequence for each school year, I’ve found that I can only devote about 3-4 weeks max to any given skill if I want to cover a good balance of different content in my PE Program. Taking this into account, I don’t normally do a full 3-4 week unit on Volleyball because I wouldn’t be able to fit in the other skills I need to cover that year.
My kids have the opportunity to play Four Square and Gaga Ball daily on our recess playground, so those are 2 lessons we cover near the beginning of the school year and usually I loop back in and cover volleyball towards the end of the year. So those 3 weeks of the year comprise my striking with hands skills unit.
What Grades Do You Teach Volleyball to?
I always teach volleyball to my 3rd – 5th kids and if I have a mature 2nd grade class or the lesson is towards the end of the year I will move them up and play with them as well.
With K-1 students I’ve had more success with exploration tasks, station activities and highly modified games, since they haven’t really built up the skills needed to play even a modified volleyball game.
If you would like to try a volleyball game with K-1st, you’ll probably need to heavily modify the rules and use a very slow floating ball like a beach ball or a large balloon.
K-2nd Striking Balloons with Hands Station Activities
For the first striking with hands lesson I do each year with my K-2 kids I always start with Balloons.
Balloons are easy for kids to control, SO MUCH FUN and a great way to allow kids to explore striking with different parts of their hands and even body parts or implements in a way that leaves everyone feeling successful.
To see how I usually run my balloon stations for striking with hands check out the video below:
View this post on Instagram
If we have time I will usually also switch out the different parts of the hands with different body parts and have kids practice striking a balloon with their Knees, Elbows, Heads etc.
Here’s a tip when using balloons: You can modify the difficulty of this activity and differentiate for different skill levels by giving a student a smaller balloon to increase the challenger, or a larger balloon to make it easier.
Electric Balloon Pump
Anytime I mention balloons, I have to give a recommend to get an electric balloon pump, this thing is a lifesaver! I used to recruit my older students to help me blow up balloons the day before my lesson, but now I can do it in no time with this electric pump.
It just might be the best $20 I ever spent – The Balloon Pump is linked up in our Amazon Store Here
Hit it UP, Down and To the Wall
For our second lesson in K-2nd we explore striking with our hands using different types of items like balloons, pool noodles or different types of balls.
To see an example of how I explain this lesson to the kids and some of the equipment we use you can check out the video below:
View this post on Instagram
You can see from the video above that I try to keep it very simple for the littles – In this lesson we focused on the same directions at every station and I allowed them to try out hitting different types of balls and a balloon with their hands Up, Down and to the Wall.
I also usually have my K-1 kids do a visualization with me and go through the motions when learning any new skill before I let them touch the equipment. I’ve found this is a good practice to help see better results with kids actually remembering your instructions and needing to repeat yourself a little bit less once you get into the activity.
Depending on the class sometimes if we have time and the kids are doing well I will have them do some partner progressions after we rotate through the 4 stations (hit to a partner and catch, hit to the wall and partner catches off the bounce etc)
You can use any ball or item you have for the stations, but here is what I’ve used in the past (also linked up in our Amazon Store):
- Volleyball Trainer (AKA No Sting Ball)
- Gatorskin Ball
- Beach ball (you can use any size but the smaller 8″-9″ is nice for small hands)
- Slo Mo “Koogle” Ball
- Pool Noodle cut in half
- Balloons 👌🏻
Keepy Uppy
Anytime I have a bunch of balloons blown up I normally plan to let the kids play Keepy Uppy. So if we have time after our station activities I will let the kids get into Partners (Going for Level 4 of Partner Acceptance of Course 😉) and play Keepy Uppy.
Normally with my K-1 students we focus on Cooperative Keepy Uppy and with the 2nd – 5th kids I introduce the idea of competitive and let them choose which one they would like to play with their partner (there’s that student choice element popping up again😄).
Keepy Uppy is a great warmup for your 3-5 students as well if you want to use it as one of the instant activities for one of your volleyball lessons – Kids Love It!
If you want more details on the rules and variations we use for Keepy Uppy, Check Out This Post
Teaching Volleyball Progressions in PE
For my older students in 3rd – 5th (or sometimes 2nd Grade depending on the time of year and group of kids 😉) we go over the basic volleyball hits of Bumping, Setting and Spiking and then get into a fun modified volleyball game to give them a fun game like experience.
Volleyball Net Setup Tips
If you have smaller classes and can just use one court to play one game then setting up a net with 2 volleyball standards isn’t a huge deal. However, if you are trying to setup multiple nets and taking them down while transitioning between classes throughout the day it can turn into a lot of work.
We use bungee cords to quickly hook and unhook our nets up and using bungees also gives more bounce to the net which makes it safer if kids to run into it or grab it during the game and prevents one of the poles falling over.
Check out the video below to see how we installed wall hooks allowing us to quickly setup multiple tennis and volleyball nets when needed.
More details on this setup and specific net heights can be found in this post
Providing Student Choice of Equipment
To kick things off I normally give kids a choice of what ball they want to use depending on their skill level and go over each hit and then give them a few minutes to practice on their own or with a partner before moving on to the next hit.
Giving kids a choice of equipment not only makes the task more appropriate for all skill levels, but will increase student engagement and intrinsic motivation because they feel like they have more autonomy and will feel more empowered in your class. We do the same thing in our Basketball Unit as well.
Implementing more student choice and also using the leveled progression challenges along with the Animated GIF Slideshows in my PE lessons has really helped to keep my students motivated and engaged in our lessons.
The Bump Pass
The first pass I usually cover is the Bump Pass. We use our screen to project different skill challenge levels for each hit, which is great if you have a screen in your teaching space, but if not you can just demonstrate a few different challenges for the students as well (For example: hit once and catch, hit 3 times and catch, continuous hitting).
The follow the leader slideshow that I use is included with the lesson plans and resources in the Striking with Hands Resource Pack linked up at the bottom of this post.
I know some people are sticklers for the grip and proper hand and arm positioning for the Forearm Bump Pass, but I don’t really care how my kids hold their hands as long as they are hitting the ball with the flat part of their forearms.
This is elementary school … I’m just happy with kids learning the basics over here 😆
If you’re short on equipment and don’t have one ball per student, you can have your kids work with a partner and do the same activities with half the equipment, if needed you could even work in groups of 3.
Sometimes when learning the bump, kids might find it easier to have their hands already set and have a partner toss it to them, instead of doing a self toss, see the video below for an example of this task variation and a few more refinements on the bump pass.
One of the most common refinements I see students needing when learning the Bump Pass, is not to swing their arms past their face, but to use their legs and shrug their shoulders when hitting the ball.
Another common mistake is kids interlocking their fingers and not using the flat part of their arm to contact the ball.
If you’re having kids work with partners, it’s also important to remind them to give a nice Rainbow Toss when they are tossing to the bumper or setter (I tell them to imagine they are underhand tossing it over the volleyball net in a rainbow). If the partner tosser isn’t giving a good rainbow toss, they won’t get much practice actually hitting the ball and practicing their skills.
While kids are practicing I walk around and help, give any needed refinements and after a few minutes or when I feel everyone has the basic idea we move on to the next pass.
The Overhead Set Pass
Next up we learn the Set Pass. Since we go over a similar concept in our Throwing and Catching Unit and our Baseball/Softball Unit of putting our thumbs together overhead and pinkies together for lower catches I like to remind kids about that concept to help it click that the skills we learn in class will easily transfer to other sports.
Check out the video below for a quick demo of the Set Pass
My basic cues for the set are for kids to make a diamond with their hands and bend and extend their knees and elbows using their fingerpads (or fingerprints) to send that straight up into the air.
You can also give kids the option to set to the wall or set to a partner for some variations on the task.
The Spike and Serve
Bump, Set and SPIKE! We’re almost ready for the game. The last thing we practice before getting into some gameplay is the underhand and overhead serve (which is basically the same motion as a spike).
Who doesn’t enjoy spiking a ball into a wall? Kids LOOOVE this one 🤣
Check out the video below for a quick demo of the Spike or Serve to a Wall
Depending on how big your class sizes are you might want to create the teams for the game while the kids are practicing the different volleyball passes and hits. You can use an app like Teamshake or just create them yourself if the class sizes are smaller.
Once we finish practicing the Spike/Serve I have my kids put up the ball and we get into our teams for the game.
One of my favorite ways to introduce volleyball to kids is with a game we call Champs Vs Challengers, which is similar to a “King of the Court” type of game and is sort of a mix of Four Square and volleyball where your goal is to move up to become the Champions and stay there as long as possible.
Champs VS Challengers
In the game of Champs Vs Challengers I split my kids up into 3 teams. One team will be on the Champions side of the Court and the other will be the Challengers, there will also be a team waiting on the bench to come onto the court once there is a point scored. The bench team always comes onto the court as the challengers.
Game Rules (modify as needed)
- Goal of the game = Be the first team to score 7 points
- Champions always serve the ball from the backline of the court
- You get 3 hits to get the ball over the net on each possession (including serve)
- The ball can be hit in the air or off the bounce but can only bounce once
- If your team scores you run around the net (not under) to the champions side and serve (If Champs score they stay there, just like a game of 4 Square)
- Champs can serve whenever they want, they don’t have to wait for the challengers to get ready (this rule helps speed the game up and creates a lot of hustle and excitement)
- No Double Hits (Same person can’t hit it 2 times in a row)
- Play the ball off the net, but players can’t touch the net or it’s a point for the opposing team
Check out a clip of the game in the video below
On the first round you might need to stop the game and clarify the rules or give refinements, but once the kids get the hang of the rotation and the rules the game moves fast.
Play to 7 points – Congratulate the winner and discuss game strategies and play again
You can also play to 5 points if you’re short on time or want to fit more rounds in or go to 10 if you want to play longer rounds. I prefer short rounds because it allows for more games, which means more teams have an opportunity to win the game.
Discussing Strategies and Giving Refinements
In between games is a great time to have a class discussion and let kids share out strategies that might be helpful for people to think about during the next round. Here are a few common points that we discuss when playing:
- Always be in Ready Position
- Champs should serve quickly to try and catch the challengers off guard
- Spread out, stay in your space and call the ball / communicate with your team
- When hitting over the net aim for open spaces
- Use all 3 of your hits to try and get better placement of the ball
- Let your team know if the ball is going out by saying “Let it Go”
Game Variations/Modifications:
- Change the type of ball – A larger and lighter ball will be easier to play with as it moves more slowly and a smaller ball will make the game more difficult and challenging
- Allow the Champs to choose between 3-4 choices of what ball they want to use to serve with
- Change the rules to allow the Challengers to serve the ball instead of the Champs
- Just play for fun and don’t keep score – making the goal of the game to stay in the Champs position as long as possible (similar to 4 square)
- Throwball – if the game is too difficult for your students, you can allow kids to catch the ball and throw it instead of hitting it and keep all other rules the same
- Blind Ball – hang a sheet over the net or use gymnastics mats for the net so you can’t see the other teams positions
Also, let’s always remember one of the most important PE Rules that transcends ALL Games… No Screaming 👌🏻
Closure
I always like to end each class with a closure and do a Quick Review, a Preview of what’s coming up next week and tell the kids Thank You for their hard work.
View this post on Instagram
Thanks for checking out this post! I hope it gave you some good ideas for your next Volleyball Lesson! If you want to go for a deep dive and get more awesome resources for Teaching Volleyball, Four Square and Gaga Ball check out our Striking with Hands Resource Pack Below!
Striking with Hands Resource Pack
Are you ready to take a deep dive in teaching Gaga Ball, Four Square and Volleyball?
Check out our Striking with Hands Resource Pack for lesson plans, station signs, cues posters and follow the leader slideshows that will make your next Striking with Hands Unit a Breeze!
The Striking with Hands Unit Resource Pack is available in our PE Specialist Membership Library (info on the program here) or on our Teachers Pay Teachers Page at the link below
Check out the Striking with Hands Unit Resource on TPT
Thanks for checking out this post – We appreciate you!
Have Fun and Teach On!